
- New hardware:
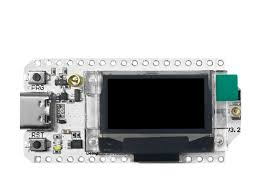
From our mentor we received a new microcontroller: LoRa32 V3.
This little device is not only more compact than an ESP32 and a LoRa, but it also contains an OLED display which makes testing more straightforward and rewarding.
The LoRa32 contains an ESP32S3, an sx1262 LoRa node and 128px-64px OLED display.
2. The usual initialization:
We must follow the same steps here as we needed to do so before. First erase flash (“
esptool erase_flash
”). Here this is much more vital, since here, Heltec, the LoRa node provider, has some demo software on the device that we must erase. Afterwards we flash the correct firmware found on this website:https://micropython.org/download/ESP32_GENERIC_S3/ using
esptool --chip esp32s3 --port COM5 write_flash 0 <firmware path>
When we are done with that we can move on to drivers, because the LoRa chip is not sx127x like the previous two, rather sx1262. So, from this Github: https://github.com/ehongtl/micropySX126X/tree/master
we copy “_sx126x.py”, “sx1262.py”, “sx126x.py”. We technically only need sx1262, but it depends on the other two drivers, so we need them to correctly run the LoRa. We also need a driver for the OLED found here:
https://github.com/JustDr00py/heltec-LoRa32-Micropython/blob/main/ssds1306.py
If we have all of these drivers, we can upload them using the copy command
mpremote cp <file path> :
3. OLED testing
First, we check whether the device is even connected and get the I2C scan. The code for this:
from machine import I2C, Pin
import time

# I2C bus
i2c = I2C(0, scl=Pin(18), sda=Pin(17), freq=100000)

# Turn on the OLED power pin
OLED_VEXT_PIN = 36
vext_pin = Pin(OLED_VEXT_PIN, Pin.OUT)
vext_pin.value(0)

# Release the OLED reset pin
i2c_rst = Pin(21, Pin.OUT)
i2c_rst.value(0)
time.sleep_ms(10)
i2c_rst.value(1)

print(i2c.scan())
It is relatively obvious that this code for the I2C scan is longer that usual. This is because the OLED is not generally designed for python and because of this, it requires some extra steps to get it to “wake up”. These include manually turning on the power and releasing the reset pin. Only after preforming these steps will, we be able to get any responses from the OLED.
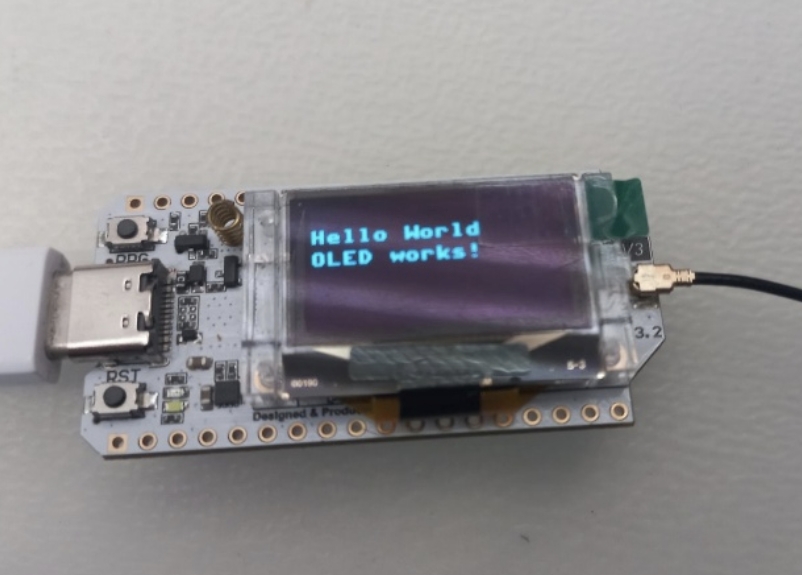
The next goal is to display something on the OLED and because we already have the correct driver, we can just write the code.
from machine import I2C, Pin
import time
import ssd1306

# I2C bus
i2c = I2C(0, scl=Pin(18), sda=Pin(17)

# Turn on the OLED power pin
OLED_VEXT_PIN = 36
vext_pin = Pin(OLED_VEXT_PIN, Pin.OUT)
vext_pin.value(0)

# Release the OLED reset pin
i2c_rst = Pin(21, Pin.OUT)
i2c_rst.value(0)
time.sleep_ms(10)
i2c_rst.value(1)

# OLED setup
oled = ssd1306.SSD1306_I2C(128, 64, i2c)

oled.fill(0)
oled.text("Hello World", 0, 12)
oled.text("OLED works!", 0, 24)
oled.show()
print("OLED works!")
So, with this we are perfectly capable of displaying all data we can fit on this 128 by 64-pixel display.
4. Setting up the new LoRa sx1262
This is extremely easy, since the code logic is unchanged, we only need to adapt to the new driver. Here is the code:
from machine import Pin, SPI
from sx1262 import SX1262

# SPI setup
lora = SX1262(spi_bus=1, clk=9, mosi=10, miso=11, cs=8, irq=14, rst=12, gpio=13)

# LoRa initialization
lora.begin(freq=868, bw=250.0, sf=7, cr=5, syncWord=0x34,
         power=17, currentLimit=60.0, preambleLength=8,
         implicit=False, crcOn=True, txIq=False, rxIq=False,
         tcxoVoltage=1.7, useRegulatorLDO=False, blocking=False)

def callBack(events):
    if events & SX1262.RX_DONE:
        msg, err = lora.recv()
        error = SX1262.STATUS[err]
        print(msg)
        print(error) if error != "ERR_NONE" else None

lora.setBlockingCallback(False, callBack)
The next step is to integrate the OLED into this process and show the data on the display. I am also noting that it was at this point where we started using struct to send data via binary after making them integers and Thonny which is like Arduino IDE for python in that it also makes uploading and testing code much more intuitive than using the command prompt with mpremote. So here is the code:
from machine import Pin, I2C
from sx1262 import SX1262
import ssd1306
import time, struct

# SPI setup
lora = SX1262(spi_bus=1, clk=9, mosi=10, miso=11, cs=8, irq=14, rst=12, gpio=13)

# LoRa initialization
lora.begin(freq=868, bw=250.0, sf=7, cr=5, syncWord=0x34,
         power=17, currentLimit=60.0, preambleLength=8,
         implicit=False, crcOn=True, txIq=False, rxIq=False,
         tcxoVoltage=1.7, useRegulatorLDO=False, blocking=False)

# Non blocking callback
def callBack(events):
    if events & SX1262.RX_DONE:
        msg, err = lora.recv()
        error = SX1262.STATUS[err]
        handleMessage(msg)
        print(error) if error != "ERR_NONE" else None

# Turn on the OLED power pin
OLED_VEXT_PIN = 36
vext_pin = Pin(OLED_VEXT_PIN, Pin.OUT)
vext_pin.value(0)

# OLED reset pin
i2c_rst = Pin(21, Pin.OUT)
i2c_rst.value(0)
time.sleep(0.01)
i2c_rst.value(1)

# Set up the I2C
i2c = I2C(scl=Pin(18), sda=Pin(17))

# Create the display object
oled = ssd1306.SSD1306_I2C(128, 64, i2c)

# Start listening
lora.setBlockingCallback(False, callBack)

def handleMessage(msg):
    t1, h, t2, p = struct.unpack("<ffff", msg) # Unpacking the data using struct

    # Converting to floats
    t1 /= 100    t2 /= 100
    h /= 100
    p /= 10

    # Displaying data on OLED
    oled.fill(0)
    oled.text(f"Temp aht : {t1:.2f}", 0, 0)
    oled.text(f"Humidity : {h:.2f}", 0, 12)
    oled.text(f"Temp bme : {t2:.2f}", 0, 24)
    oled.text(f"Pressure : {p:.2f}", 0, 36)
    oled.show()
    time.sleep(1)

# Waiting for data
count = 0
while True:
    oled.fill(0)
    oled.text("Listening", 32, 16)
    oled.text(str(count), 32, 32)
    oled.show()
    count += 1
    time.sleep(0.1)
The test is successful. Our ground unit is capable of displaying the received data.
Original documentation written by: Regőczi Áron
Adapted for the website by: Fazekas Boldizsár
